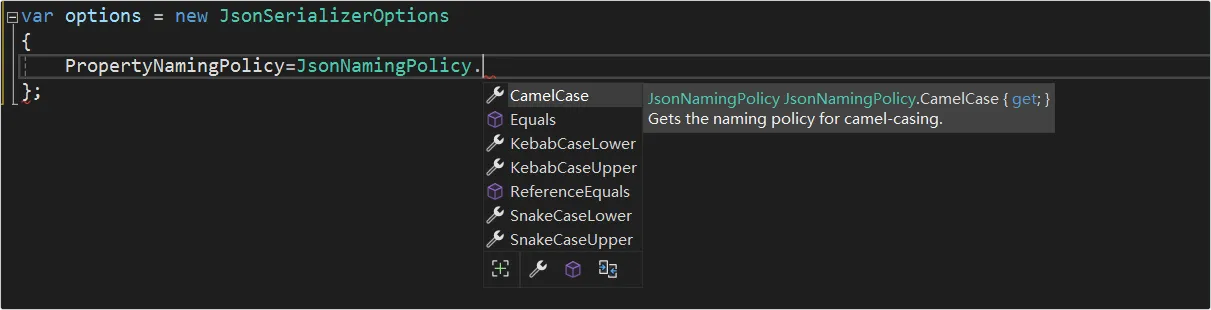
var options1 = new JsonSerializerOptions { PropertyNamingPolicy = JsonNamingPolicy.KebabCaseLower, }; var options2 = new JsonSerializerOptions { PropertyNamingPolicy = JsonNamingPolicy.KebabCaseUpper, }; var options3 = new JsonSerializerOptions { PropertyNamingPolicy = JsonNamingPolicy.SnakeCaseLower, }; var options4 = new JsonSerializerOptions { PropertyNamingPolicy = JsonNamingPolicy.SnakeCaseUpper, }; Console.WriteLine(JsonSerializer.Serialize(new UserInfo() { UserName = "oec2003" }, options1)); Console.WriteLine(JsonSerializer.Serialize(new UserInfo() { UserName = "oec2003" }, options2)); Console.WriteLine(JsonSerializer.Serialize(new UserInfo() { UserName = "oec2003" }, options3)); Console.WriteLine(JsonSerializer.Serialize(new UserInfo() { UserName = "oec2003" }, options4));
public class UserInfo { public string? UserName { get; set; } }
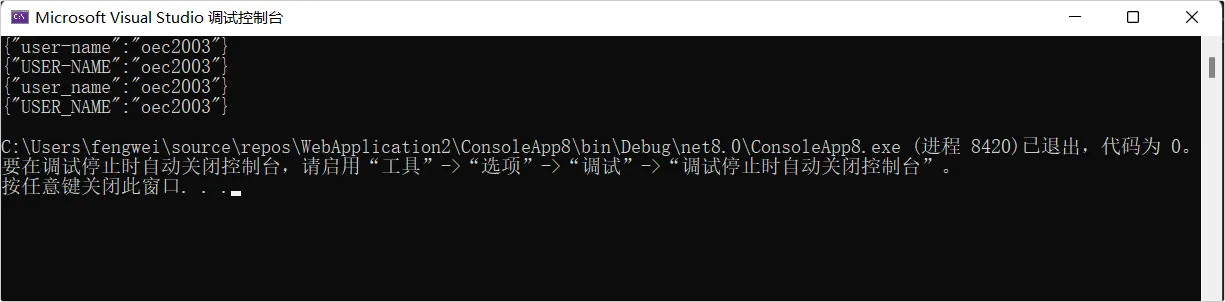
结果如下:
调用 API 直接获取到对象
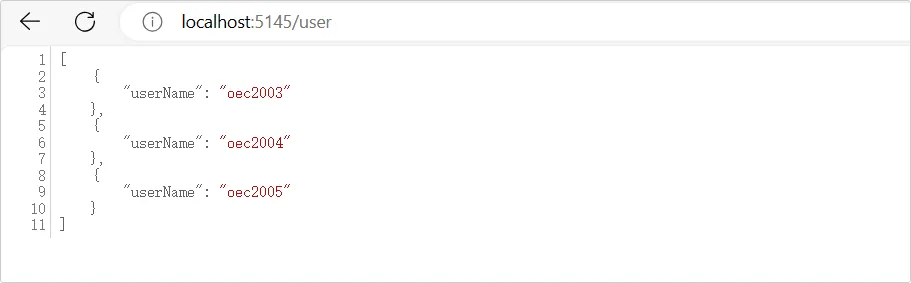
现在有一个接口返回如下图中的数据:
如果是在 8 以前的版本中获取该接口的数据,需要先获取到接口内容,然后进行反序列化,代码如下:
1 2 3 4 5 6 7 8 9 10 11 12
const string RequestUri = "http://localhost:5145/user"; using var client = new HttpClient(); var stream =await client.GetStreamAsync(RequestUri); //反序列化 var users = JsonSerializer.DeserializeAsyncEnumerable<UserInfo>(stream); await foreach(UserInfo user in users) { Console.WriteLine($"姓名:{user.userName}"); } Console.ReadKey();
const string RequestUri = "http://localhost:5145/user";
using var client = new HttpClient();
IAsyncEnumerable<UserInfo> users = client.GetFromJsonAsAsyncEnumerable<UserInfo>(RequestUri);

await foreach (UserInfo user in users)
{
    Console.WriteLine($"姓名: {user.userName}");
}
Console.ReadKey();

public record UserInfo(string userName);
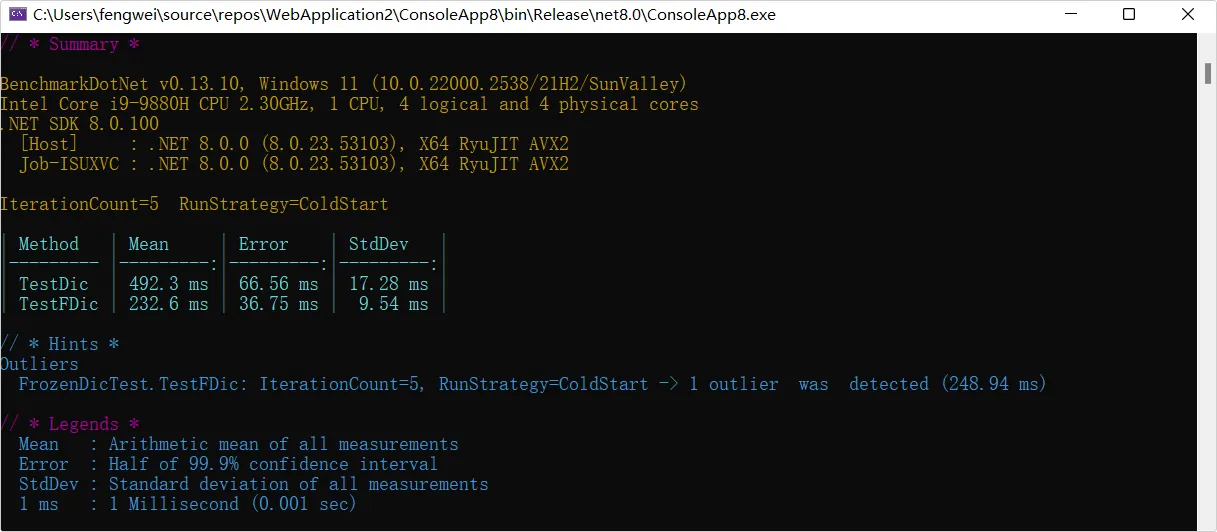
上面两种代码的结果一样,如下图:
随机数增强
1、在 8 中对随机数类 Random 提供了 GetItems() 方法,可以根据指定的数量在提供的一个集合中随机抽取数据项生成一个新的集合:
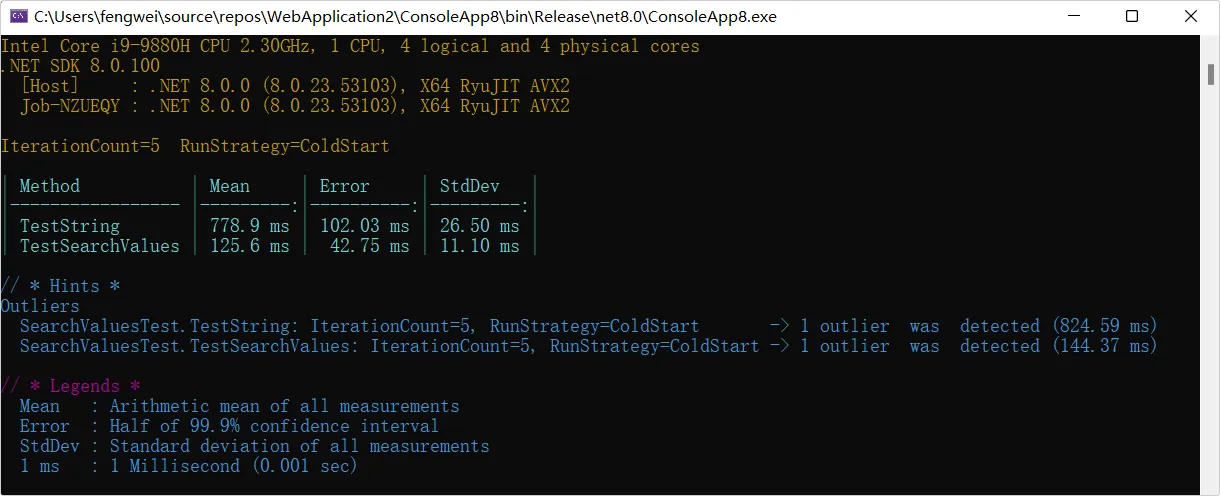
[SimpleJob(RunStrategy.ColdStart, iterationCount: 5)] public class SearchValuesTest { [Benchmark] public void TestString() { var str = "!@#$%^&*()_1234567890ABCDEFGHIJKLMNOPQRSTUVWXYZabcdefghijklmnopqrstuvwxyz"; for (int i = 0; i < 100000000; i++) { str.Contains("z"); } }
[Benchmark] public void TestSearchValues() { var sv = SearchValues.Create("!@#$%^&*()_1234567890ABCDEFGHIJKLMNOPQRSTUVWXYZabcdefghijklmnopqrstuvwxyz"u8); byte b = (byte)"z"[0]; for (int i = 0; i < 100000000; i++) { sv.Contains(b); } } }