在上一篇《Windows下搭建Octopress博客》中介绍了怎样在Windows环境中搭建Octopress博客,以及如何部署到Github中,本文主要讲解怎样对Octopress进行一些设置,比如修改博客标题、添加侧边栏等等。
Octopress文件目录
首先来看下Octopress的文件目录吧,因为很多的设置就是从这里开始的。
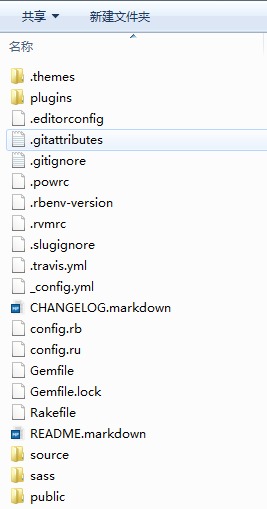
刚clone下来的Octopress源码没有最后的三个文件,当执行了rake install后会产生最后的三个目录。
source:该目录是执行rake install后从.themes\classic目录中的source拷贝而来,并且添加了一个_posts目录了,当执行了rake new_post[‘title’]后会在_post生成博文的markdown文件。包括后面的很多设置页是在该目录中进行
sass:也是在执行rake install后从.themes\classic目录中的source拷贝而来。Sass 扩展了 CSS3,增加了规则、变量、混入、选择器、继承等等特性。Sass 生成良好格式化的 CSS 代码,易于组织和维护
public:刚clone源码时public是个空目录,当执行了rake generate后会编译source的内容然后将编译后的内容复制到public目录中,在执行rake deploy后也是讲public的内容推送到服务器上,我们最终访问到的也是public的内容。这个目录中的内容一般不用我们手动修改,执行rake generate来生成。
基本设置
在Octopress目录中有一个名为_config.yml的文件:
1 | url: [http://oec2003.github.io](http://oec2003.github.io/) #网站地址 |
在使用rake new_post[‘title’]生成的markdown文件中,可以对每篇博文进行一些设置:
1 | layout: post |
设置网站的description和keywords
在网页的head部分设置name为description和keywords的meta元素可以让网页更容易被搜索引擎搜索到,下面说说怎样在Octopress中设置首页和每篇博文的description和keywords。
设置首页
打开source/index.html文件,在文件的头部添加相应内容:
1 | layout: default |
设置文章
文章的设置直接在每篇文章对应的markdown文件的头部添加相应内容即可:
1 | layout: post |
导航栏设置
打开文件source\_includes\custom\navigation.html,默认情况下如下所示:
1 | <ul> |
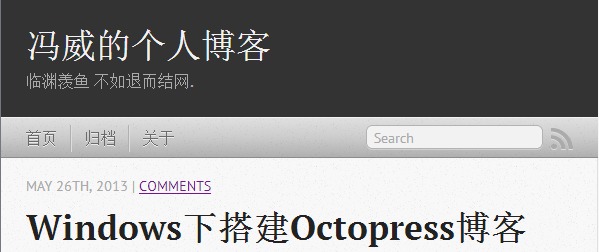
可以将Blog和Archives修改为首页和归档,不过记得将包含有中文的文件保存为无BOM的UTF-8编码格式。也可以在此添加一个标签页,比如加上一个关于,我们可以按下面步骤实现:
使用命令rake new_page[‘about’]创建一个页面,页面路径为source\about\index.markdown;
修改上面的navigation.html为:
1 | <ul> |
显示效果如下:
添加侧边栏文章分类
我们知道在文章的markdown文件中有一个categories可以进行设置文章的分类,设置了categories的文章在文章的尾部会显示分类的链接,如果想在侧边栏中展示所有的分类,可以按以下步骤进行:
- 在plugins目录中创建category_list_tag.rb文件,文件内容如下:
1 | module Jekyll |
- 添加source/_includes/asides/category_list.html文件,内容如下:
1 | <section> |
再次强调,文件中含有中文需要保存为无BOM的UTF-8格式
- 修改_config.yml文件,在default_asides项中添加asides/category_list.html,值之间以逗号隔开。
1 | default_asides: [asides/category_list.html, asides/recent_posts.html] |
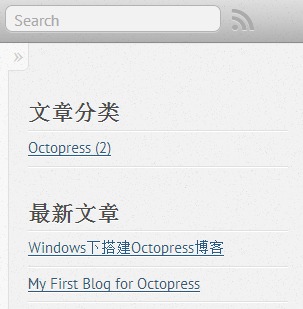
如果想将最新文章的Recent Posts修改为中文,修改source_includes\asides\recent_posts.html即可。
在侧边栏中还可以添加其他的一些组件,如新浪微博、我的豆瓣、最新评论、标签云等,添加页面以及让其显示的方法和上面类似,只是在内容取值有所差别。
添加评论
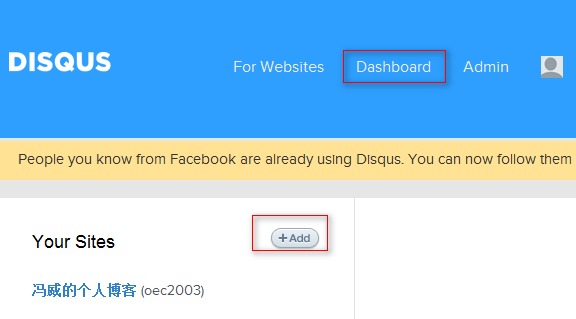
Octopress自身不支持评论功能,不过我们可以使用第三方的评论系统,国外的有Disqus,国内的有多说等。下面介绍怎样在Octopress中使用Disqus。
首先需要在Disqus注册一个账号,登录后点击Dashboard,然后添加站点信息
然后在_config.yml文件中进行下面设置
1 | # Disqus Comments |
添加版权声明
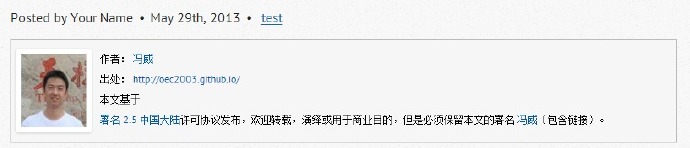
这里所说的版权声明是指每篇文章后面的版权信息
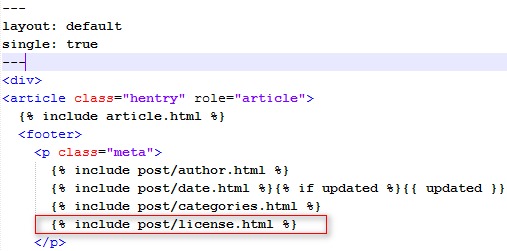
首先source_includes\post目录中添加license.html文件,文件内容如下:
1 | {% if site.post_license %} |
在sass\custom_styles.scss添加如下样式信息来控制版权信息的样式
1 | .oec2003right |
修改文件source_layouts\post.html
在_config.yml添加配置项用来控制是否显示页面的版权信息
1 | # Post License |
最终展示效果:
使文章以摘要形式展示
默认情况下在博客的首页是显示每篇文章的全部内容,更多时候我们只想在首页展示文章的一部分内容,当点击阅读全文时进入到文章的详细页面,在Octopress中可以很轻松实现该功能:
在文章对应的markdown文件中,在需要显示在首页的文字后面添加<!—more—>,执行rake generate后在首页上会看到只显示<!—more—>前面的文字,文字后面会显示Read on链接,点击后进入文字的详细页面;
如果想将Read on修改为中文,可以修改_config.yml文件
1 | #excerpt_link: "Read on &rarr;" # "Continue reading" link text at the bottom of excerpted articles |
几个参考
添加最新评论到侧边栏
http://yanping.me/cn/blog/2012/02/07/comment-sidebar/
添加标签云
http://codemacro.com/2012/07/18/add-tag-to-octopress/
总结
其实所谓的设置都是去修改Octopress的源文件的一些内容,或是根据Octopress的文件组织方式去添加一些页面等,将Octopress的每个文件都打开看看基本就了解个大概了。
本文采用 署名-非商业性使用-相同方式共享 4.0 国际 许可协议,转载请注明出处。


